


Tampilkan postingan dengan label Networking. Tampilkan semua postingan
FreeBSD driver HSDPA modem
Newer HSDPA/UMTS/3G devices (USB dongles) from Option comes with a “packet interface” and requires a special driver, older cards should work just fine with ubsa(4), u3g(4) or any similar serial-over-USB driver.
devices have been verified to work
- Option GlobeSurfer iCON 7.2 (2.4.6Hd firmware)
- Option iCON 225
- Option iCON 505
- Option iCON 452
If you have any other device (like iCON 031, iCON 210, iCON 315, iCON 322, iCON 401, iCON 431, iCON 451), please test and report. Thanks.
Note that the driver currently doesn’t recognize other devices, although most newer Option HSDPA devices should work. More devices IDs will be added as devices are found. If you own any newer Option device that appears as a USB device, please report back with the device ID.
Note: iCON 7.2 devices with older firmwares are supported by ubsa(4) if you add the correct device ID, or by the new u3g driver available in 8.0 or later. You have the old firmware the device ID of the mass storage device is 0×05C6 and changes when you switch the device.
Note: This is NOT for cards based on the Nozomi chipset.
FreeBSD 9/CURRENT
Included in BASE.See uhso(4) and uhsoctl(1) for more information> kldload uhso
FreeBSD 8
The FreeBSD 8 driver can be installed through FreeBSD ports. It’s available in comms/uhso-kmodFreeBSD 8 Driver – uhso-20100416.tar.gz> cd /usr/ports/comms/uhso-kmod > make install
FreeBSD 8 Connection utility – uhsoctl-20100416.tar.gz
FreeBSD 7
Not that this version of the driver is unmaintainedThe FreeBSD 7 driver can be installed through FreeBSD ports. It’s available in comms/hso-kmod
Please see hsoctl(1) for instructions on how to connect to your provider.> cd /usr/ports/comms/hso-kmod > make install
FreeBSD 7 Driver – hso-20081023.tar.gz
FreeBSD 7 Connection utility – hsoctl-20081023.tar.gz
option-iconf.conf for devd (automatic mode switching)
option-iconf.conf
Manual install
A simple make should do the trick. If the build would fail for some reason, make sure you have the latest tarball and that the usbdev patch was applied properly. If it still fails, send me a mail with the (whole) error message together with which FreeBSD version you are using.The following is only required for FreeBSD 7
These devices are so-called ZeroCD devices that when plugged in appears as a mass storage device with windows drivers. To get the HSDPA interface the device needs to be switched, this can be done automatically with camcontrol and devd. The umass(4) driver must be present in the kernel or loaded as a module for this to work.
Add the following to a file called option.conf and place it in /etc/devd/ (create the directory if it doesn’t exits) then restart devd with /etc/rc.d/devd restart
Make sure you replace the product id (0×6911) with the one your device has, you should be able to get it with usbdevs -v
attach 100 {
match "device-name" "umass[0-9]+";
match "vendor"  "0x0af0";
match "product" "0x6911";
match "devclass" "0x00";
action "sleep 1; /sbin/camcontrol cmd `/sbin/camcontrol devlist | /usr/bin/grep ZCOPTION |
/usr/bin/awk '{match($11, /pass[0-9]+/); print substr($11, RSTART, RLENGTH) }'`
-c '01 00 00 00 00 00' -i 1 i1 > /dev/null";
};
Using the driver
Load the kernel module and plug in your deviceIf the driver identifies your device you should see something like this> kldload uhso.ko
And a new network interface should have appeareduhso0: <Network port> at <Option N.V. Globetrotter HSDPA Modem> on usbus5 uhso1: <Diagnostic port> at <Option N.V. Globetrotter HSDPA Modem> on usbus5
In addition to this several TTY devices should have been created, you can figure out how many by using sysctl.> ifconfig hso0: flags=0<> metric 0 mtu 2048
sysctl dev.uhso
Connection with the uhsoctl connection utility
The uhsoctl connection utility automatically creates and maintains a connection.It will automatically set IP-address and default route, and update/etc/resolv.conf with the correct nameservers.
It can run both in background and in foreground mode. The execution syntax is hsoctl [options] interface, the following options are recognized (most of with are optional).
-a APN – Access point name
-p PIN – Specify device PIN.
-u username
-k password
-c PDP context ID
-r path – Path to resolv.conf (use /dev/null to disable)
-f path – Specify serial port device to use
-n – Do not fork into background (run in foreground)
-b – Fork into background directly (without waiting for a connection)
-d – Disconnect
Foreground example
Hitting CTRL-C will close the connection.
Background example> uhsoctl -n -a bredband.tre.se -p 1234 uhso0 Searching for network (UMTS) Registered to "3" (UMTS) Connected to "3" (bredband.tre.se), carrier UMTS IP address: 78.156.206.64, Nameservers: 80.251.192.244, 80.251.192.245 Status: connected (UMTS), signal: -87 dBm ^C >
> uhsoctl -a bredband.tre.se -p 1234 uhso0
Searching for network (UMTS)
Registered to "3" (UMTS)
Connected to "3" (bredband.tre.se), carrier UMTS
IP address: 78.156.206.64, Nameservers: 80.251.192.244, 80.251.192.245
>
> uhsoctl -d uhso0
Disconnecting uhso0
>
Manual connection
Look up the serial portsOpen one of them, for example the Control or Application port, in a terminal# sysctl dev.uhso dev.uhso.0.netif: uhso0 dev.uhso.0.type: Network/Serial dev.uhso.0.ports: 2 dev.uhso.0.port.control.tty: cuaU0.0 dev.uhso.0.port.control.desc: Control dev.uhso.0.port.application.tty: cuaU0.1 dev.uhso.0.port.application.desc: Application ... dev.uhso.1.type: Serial dev.uhso.1.ports: 1 dev.uhso.1.port.diagnostic.tty: cuaU1 dev.uhso.1.port.diagnostic.desc: Diagnostic
application like minicom. Issue the following commands to establish a connection.
Configure the interface and set a default routeAT+CPIN="1234" # Your PIN OK AT+CGDCONT=1,,"bredband.tre.se" OK AT_OWANCALL=1,1,1 OK AT_OWANDATA=1 _OWANDATA: 1, 95.209.79.126, 0.0.0.0, 80.251.201.177, 80.251.201.178, 0.0.0.0, 0.0.0.0, 72000
# ifconfig uhso0 95.209.79.126
# route add default -interface uhso0
Manual connection
Figure out which serial ports thatOpen /dev/cuaHSO0.0 (or cuaHSO0.1) with a terminal program (for example minicom), baud rate doesn’t matter.
If your SIM card requires a PIN
Next, configure the APN (you should have the details from your provider), you only need to do this once (or when you change APN).AT+CPIN? +CPIN: SIM PIN AT+CPIN="1234" OK AT+CPIN? +CPIN: READY
If a username and password is required, it can be specified withAT+CGDCONT=1,,"bredband.tre.se" OK
To create the connection, typeAT$QCPDPP=1,1,"pass","user"
The LED on your device will stop blinking and get a steady shine when you’re connected.AT_OWANCALL=1,1,0
Now, to get the IP info type
The first address is your ip-address, the third and the fourth are your name servers. Now simply configure the network interface with this information as any other network connection.AT_OWANDATA=1 _OWANDATA: 1, 79.138.181.171, 0.0.0.0, 80.251.192.244, 80.251.192.245, 0.0.0.0, 0.0.0.0, 72000
Your connection should be ready now> ifconfig hso0 79.138.181.171/32 > route add default -interface hso0 > echo "nameserver 80.251.192.244" >> /etc/resolv.conf > echo "nameserver 80.251.192.245" >> /etc/resolv.conf
The connection can be closed with the following command> ping ping.sunet.se PING ping.sunet.se (192.36.125.18): 56 data bytes 64 bytes from 192.36.125.18: icmp_seq=0 ttl=251 time=131.873 ms 64 bytes from 192.36.125.18: icmp_seq=1 ttl=251 time=130.545 ms ^C --- ping.sunet.se ping statistics --- 2 packets transmitted, 2 packets received, 0.0% packet loss round-trip min/avg/max/stddev = 130.545/131.209/131.873/0.664 ms
AT_OWANCALL=1,0,0
Konfigurasi Network Interface di FreeBSD
pada kesempatan kali ini saya akan mendokumentasikan bagaimana cara melakukan konfigurasi network interface pada sistem operasi FreeBSD. Asumsi yang digunakan pada penulisan ini adalah:
setelah semua asumsi dipahami, sekarang berlanjut ke langkah-langkah konfigurasi network interface:
- sistem operasi yang digunakan adalah FreeBSD, yang digunakan penulis dalam pembuatan dokumentasi ini adalah FreeBSD 7.0-RELEASE
- network interface card telah terpasang pada sistem
- IP yang digunakan pada dokumentasi ini mungkin berbeda dengan yang akan digunakan, jadi sesuaikan dengan kebutuhan
-
ketikkan perintah sebagai berikut untuk mengetahui konfigurasi awal dari network interface yang dimiliki oleh sistem:
setelah mengetikkan perintah tersebut maka pada shell akan keluar contoh sebagai berikut :ifconfig -a
hasil keluaran dapat berbeda pada masing-masing sistem. Sesuai dengan network interface yang digunakan pada sistem.crescentserv# ifconfig -a
le0: flags=8843 metric 0 mtu 1500
options=8
ether 00:0c:29:5a:b5:b9
inet 192.168.1.253 netmask 0xffffff00 broadcast 192.168.1.255
inet 192.168.2.1 netmask 0xffffff00 broadcast 192.168.2.255
media: Ethernet autoselect
status: active
plip0: flags=108810 metric 0 mtu 1500
lo0: flags=8049 metric 0 mtu 16384
inet6 fe80::1%lo0 prefixlen 64 scopeid 0x3
inet6 ::1 prefixlen 128
inet 127.0.0.1 netmask 0xff000000
- pada dokumentasi ini konfigurasi akan dilakukan pada network interface le0 dengan konfigurasi sebagai berikut:
IP address : 192.168.1.251
Netmask : 255.255.255.0
IP gateway : 192.205.1.1
DNS Address : 191.168.1.1 - untuk mensetting network interface pastikan anda memiliki akses sebagai root terlebih dahulu
- ketikkan perintah :
dan untuk melakukan setting default gateway ketikkan perintah:ifconfig le0 inet 192.168.1.251 netmask 255.255.255.0 up
route add default 192.168.1.1 - dengan menggunakan cara di atas, ketika dilakukan reboot pada sistem
maka konfigurasi tersebut akan hilang. Hal ini dapat diatasi dengan
meletakkan konfigurasi pada file konfigurasi
buka file konfigurasi tersebut dengan menggunakan editor text favorit anda/etc/rc.conf - tambahkan baris berikut pada file tersebut:
sesuaikan dengan kebutuhan dan network interface yang dipakai. setelah selesai, save dan keluar dari editor.ifconfig_le0="inet 192.168.1.253 netmask 255.255.255.0"
jika terdapat saran dan kritik dapat melalui comment pada artikel ini.
sekian, terima kasih.
Share Koneksi Internet Host-Guest di VirtualBox

Untuk menghubungkan OS Guest ke Internet, cara paling mudah adalah ‘menancapkan’ Modem GSM tersebut pada OSGuest. Adapun cara-caranya sama persis seperti memasukkan USB flashdisk ke dalam Guest (sudah dibahas sebelumnya). Selanjutnya tinggal install modem dan sedikit konfigurasi jaringan sesuai operator, niscaya OS Guest akan terhubung ke duina maya.
Kelemahannya, Tentu OS Host akan kehilangan koneksi Internet karena modem tersebut telah di ‘eject’ oleh Virtualbox. Tentu butuh sedikit trik apabila anda ingin menghubungkan keduanya sekaligus.
Seperti biasa, media kali ini adalah Windows 7 sebagai Host, Windows XP sebagai guest, dan VirtualBox sebagai Virtual Machine.
Pertama, saya mengkoneksikan modem GSM saya (akses 3data) melalui OS Host.

Klik kanan 3data (akses modem) dan pilih properties > Sharing. Centang “allow other network user use this internet connection” dan arahkan ke VirtualBox host-only Network. Pastikan jaringan host-only aktif (tidak di-disable).

Akan muncul peringatan, bahwa username dan password (dalam hal ini username dan password koneksi 3data) tidak akan dibagikan ke user di jaringan, yang dibagi hanya koneksinya saja. Klik OK.

Muncul lagi peringatan, karena ada jaringan yang di-share, alamat IP LAN (maksudnya virtualbox host-only) akan diubah menjadi 192.168.137.1 dan koneksinya akan terputus. Perhatikan peringatan yang satu ini, kalau perlu catat alamat IP-nya.

Peringatan lagi, karena 3data sedang aktif, perubahan akan diterapkan setelah modem di restart. Karenanya sekarang disconnect-kan dan connect-kan kembali modem GSM kita.

Berikut hanya memastikan, apakah alamat IP Virtualbox Host-only telah berubah. Ternyata sudah berubah menjadi 192.168.137.1.


Berhubung alamat IP Host telah berubah, ganti juga alamat IP Guest dengan network yang sama. Kali ini saya ubah ke 192.168.137.2. Tambahkan juga gateway ke arah host (192.168.137.1)
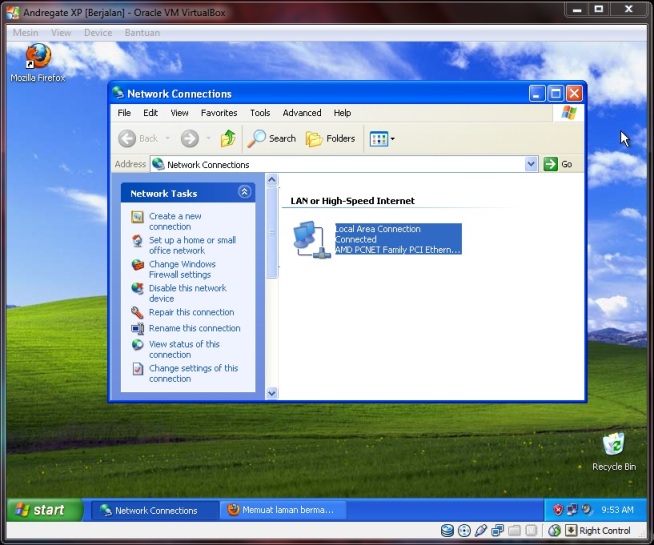

Untuk memastikan sudah terhubung apa belum, coba ping antar keduanya. Host menuju guest dan sebaliknya.


Nah, sudah reply semua tapi belum ada perubahan. Entah kenapa di komputer saya, saya perlu me-restart OS Guest (Windows XP) untuk membuat perubahan. Bagaimana dengan komputer anda? Yang jelas, setelah di restart jaringan di Windows XP akan sedikit berubah dari sebelumnya.ya, jaringan share dari SASA-X1 (nama komputer Host) telah muncul dengan status ‘connected’.

Ayo, coba browsing internet dan lihat hasilnya...
Tag :
Komputer,
Networking,